Landing Zone Creation
Creating a landing zone and uploading data into a project requires that sample sheets are available in the project and the corresponding iRODS collections have been created. For instructions on how to set up sample sheets for a SODAR project, see Metadata Recording and Importing and Creating Sheets.
Creating landing zones and uploading files is permitted to users with the project contributor access level or higher.
There is no limit on how many zones you can create and multiple simultaneous landing zones for a single assay are allowed.
Initially navigating to the Landing Zones app presents you a notification on no zones being available, with a Create Zone button on the right hand side.

Landing zone list with no zones
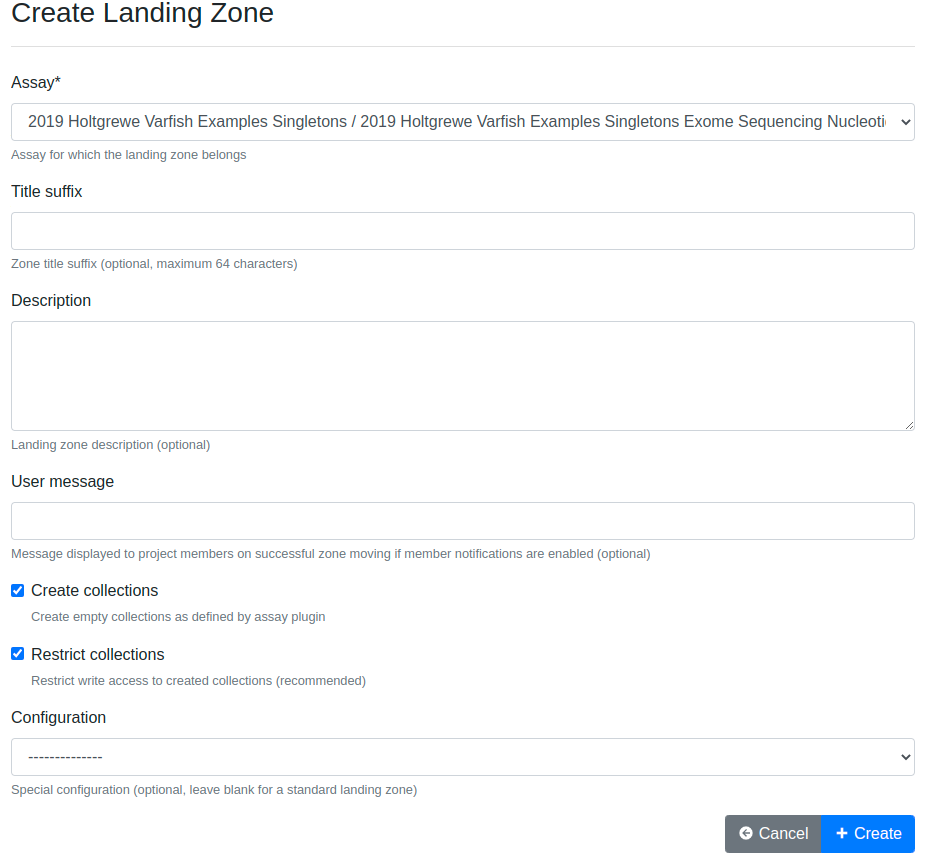
Clicking the button opens up the landing zone creation form, which allows you to set up and configure your new landing zone.

Landing zone creation form
The form contains the following fields:
- Assay
The assay under which the files in this landing zone will be uploaded.
- Title Suffix
Optional suffix for the landing zone title, mostly usable for differentiating between multiple zones.
- Description
Optional description for e.g. notes regarding the landing zone.
- User Message
Optional message displayed to project users upon successful validation and upload of this zone. This can contain e.g. a description of the files uploaded.
- Create Collections
If set true, this will automatically create the expected root level collections under the zone. This helps to e.g. assure the expected collection names for libraries and avoid errors such as typos. Creation is enabled by default. When moving files from the landing zone, empty collections will not be created in the sample repository.
- Restrict Collections
If set true and “create collections” is enabled, user write access is restricted to the automatically created collections. Subcollections can be freely created under existing collections, but the user has no permission to create new collections in the landing zone root. This will prevent accidental uploads to collections with names not corresponding to paths expected in the related sample sheets. If there is need to e.g. upload data corresponding to libraries not yet in the sample sheets, this option can be set false.
- Configuration
Selection for special configurations of landing zones with extra features. In most use cases this should be left blank.
Once you have filled out the form, clicking Create will start the zone creation process and redirect you to the landing zone list, where you can see the zone status and move further with file uploads.
The next sections will provide instructions on browsing your landing zones and how to proceed with your file uploads.
Landing Zone Update
Landing zones can be updated by following the Update Zone link on the dropdown menu on the right hand side of the zone list. This opens up the same form as in the creation process, with the fields pre-filled with the current values. Currently the only fields that can be updated are description and user message. Once you have made your changes, click Update to save them.