WinSCP Installation & Setup
WinSCP is a Windows program that can be used to access the files in the SODAR WebDAV. This section describes the installation and setup for accessing your files with WinSCP (with special note on Charite Workstations).
Note
In general, it is also possible to access files and folders through WebDAV using the Windows Explorer. However, we discourage you from doing this as there are important limitations to Windows Explorer’s support of WebDAV, e.g., you cannot access files larger than 4 GB.
Prelude: Files in Your Web Browser
To just browse the files and downloading single files, you do not need to have any special program installed.
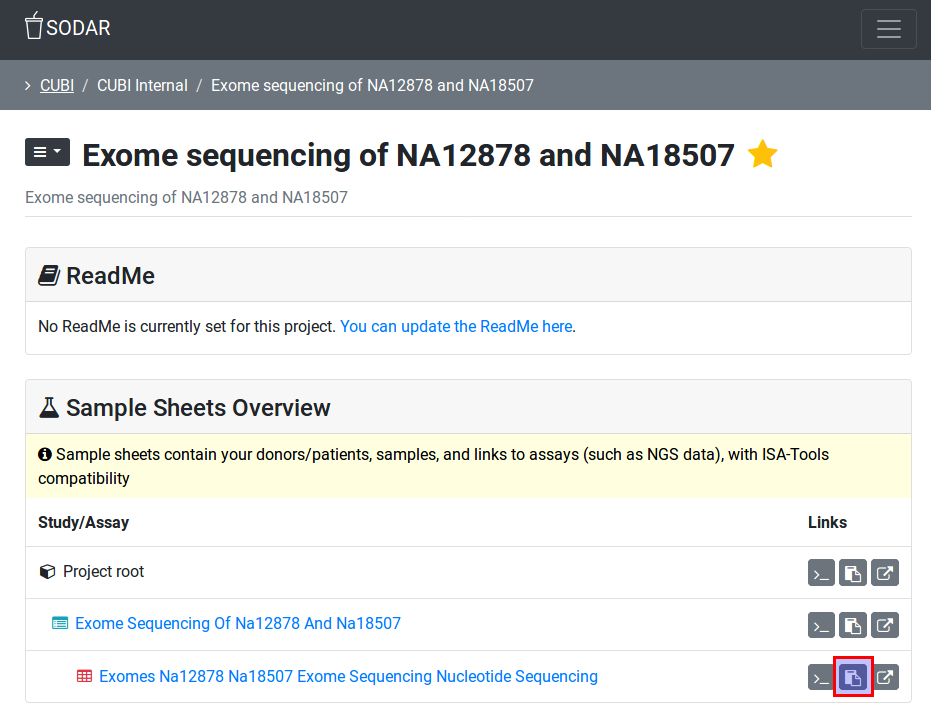
First, go to your project that has file access enabled. All files of your project are associated with assay results. In the “Sample Sheets Overview”, you can copy the URL to the WebDAV server to your clipboard. For this, use the corresponding button next to the assay or project that you want to get data from.
Installing WinSCP
First, you have to download WinSCP. This is most conveniently done by installing the “portable” version which you just have to unpack and you don’t need to install.
Go to this website:
Click on “Download” below “Portable Executable”.
Next, extract the downloaded ZIP file and go into the folder created by unpacking the ZIP file.
Note
It is very important to download the data to drive
C:\, otherwise you will get connection and address resolution problems later!Inside, you find a “WinSCP” program that you execute.
Using WinSCP
When you start the program for the first time, you will be greeted with a “Login” dialog.
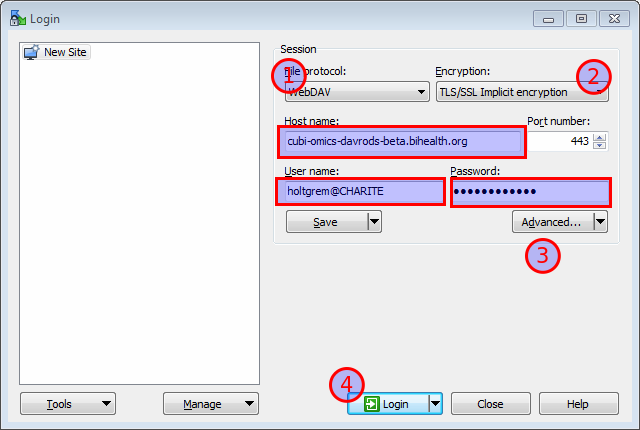
Paste the full URL to the WebDAV server (see above) into the “Host” section.
The “File Protocol” field will be automatically updated to “WebDAV”.
The “Encryption” field will be set to “TLS/SSL Implicit encryption”.
Enter your user name into “User name”
Next, check that the correct path to the directory is used for connecting. Click “Advanced”.
Select “Directories” and make sure that a path starting with
/omicsZone/projectsis shown in the “Remote directory” field.
If this is not the case, use the path from the full URL/address after
bihealth.org/(see above).Click “OK”.
Back in WinSCP login window, click “Login”
You can now browse the file from CUBI SODAR via WinSCP.
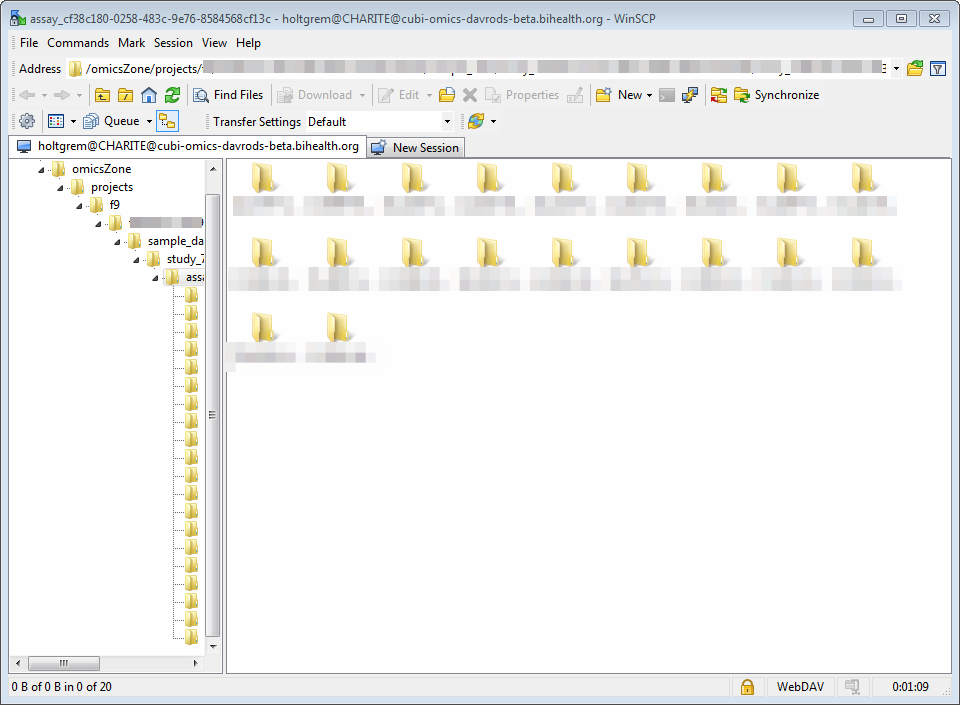
You can drag and drop files outside the WinSCP window to copy them to any place of your liking on your workstation.