Editing Sample Sheets
The Sample Sheets application allows editing the sample sheets within its UI. Editing sample sheets is allowed for users with project contributor access or higher. Changes are saved into the SODAR database and the edited version can be exported as ISA-Tab TSV for use with other software. This section provides guidance for sample sheet editing in the UI.
Attention
Editing features are under construction. Not all features supported by the ISA-Tab model can yet be edited. Missing features are noted as such in this section.
Edit Mode
To begin editing the sample sheets, open the Sheet Operations dropdown and select Edit Sheets. This will reload the current study and open it in edit mode, which differs somewhat from the default browsing UI.
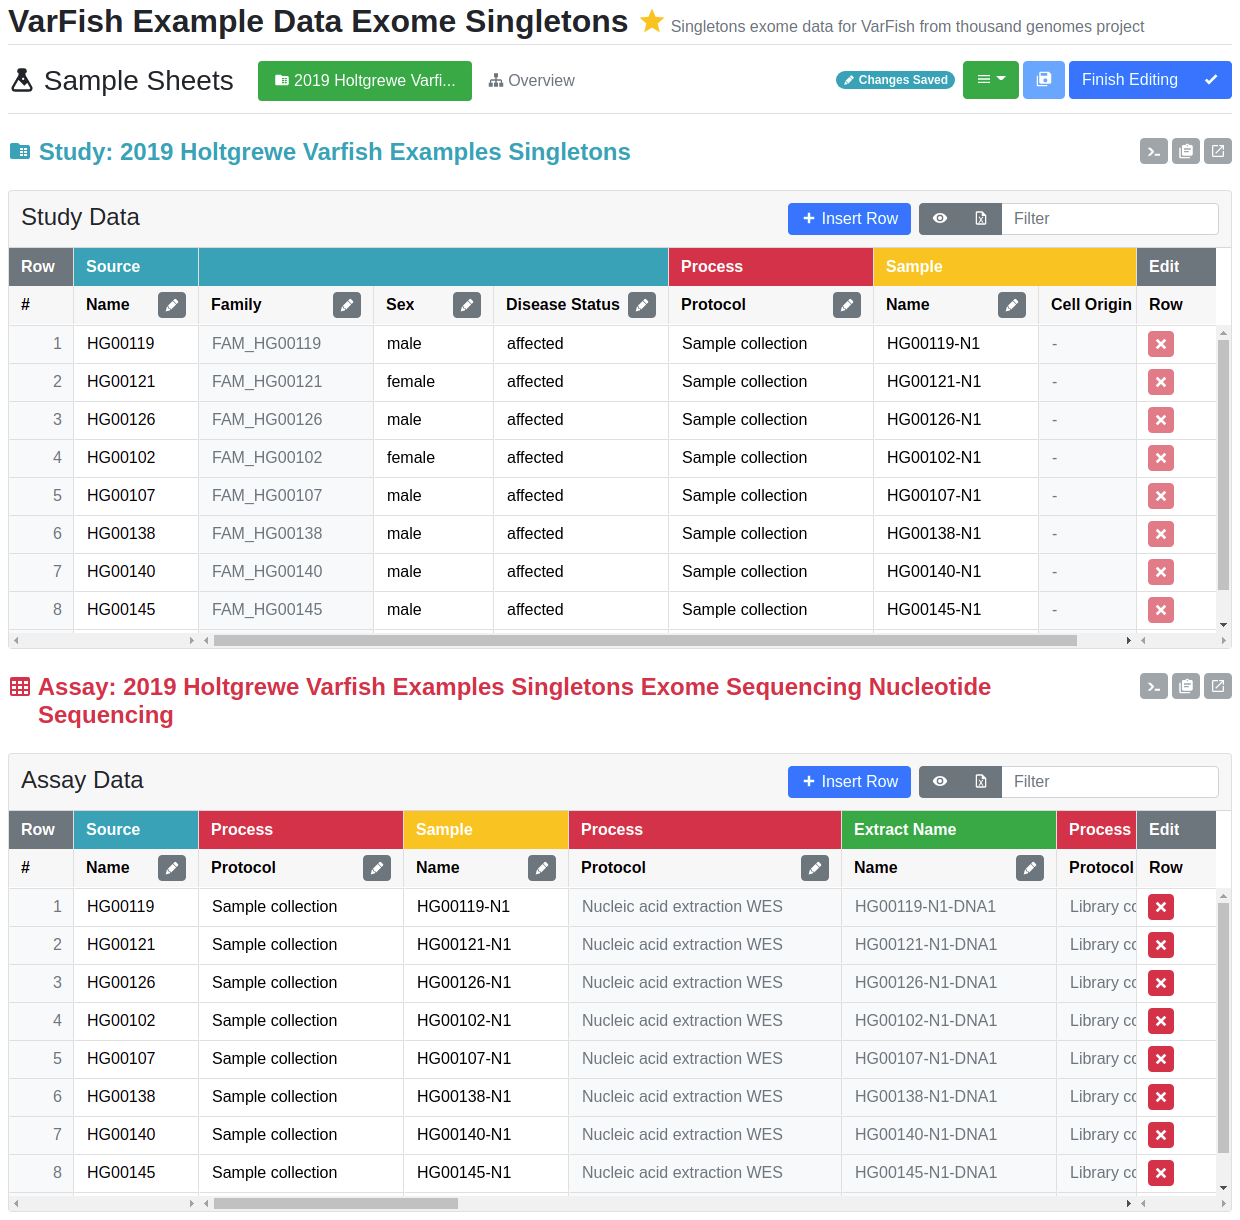
Sample sheet UI in edit mode
Differences of edit mode:
The navigation bar displays the edit mode status badge along with the version backup button.
The Overview tab is disabled.
The Sheet Operations dropdown is replaced by a Finish Editing button.
An Insert Row button is added to the table header.
Column headers contain buttons for configuring editing options for that specific column.
Column cells are grayed out if editing the column is currently disabled.
iRODS columns are hidden and replaced by a row edit column.
Hyperlinks for e.g. ontology terms are not rendered in table cells.

Editing status badge and navigation buttons
Cell Editing
To start editing the value of a cell, you can either double click it with the mouse of press enter if you are navigating the table using a keyboard.
Changes to cells are saved immediately when committing the change with the enter key or clicking outside of the cell. If the value is not valid for the column configuration, the UI will inform you and allow correcting the value. You can verify that changes have been saved by the Changes Saved text in the edit mode status badge in the navigation UI.
It is possible for the user to toggle study table columns visible in assay tables. In case of an edit to a cell which appears in multiple tables, the value will automatically update in all tables.
The type of editing presented depends on the type of the column. Different editing modes are detailed below.
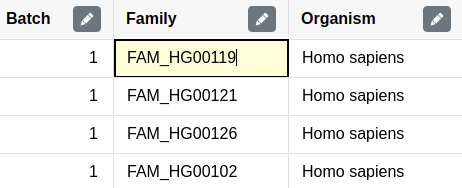
Basic String or Numeric Input
Editing a cell with a basic string, integer or numeric value allows you to enter the value simply by typing in a standard spreadsheet fashion.
String cell editing
Special syntax is available for basic string and/or numeric values:
- Value as List
You can enter a list of values by separating single values with the semicolon character (
;). This works for both string and numeric columns.- Hyperlinks
You can render the value as a hyperlink the following syntax:
Link text <https://your.url>. This is only allowed for string columns.
There are also special cases for string input and specific columns:
- Node Names
Node names are restricted to basic string editing with no list values or hyperlinks supported. Note that editing the name cell of an existing node will rename the existing node. Changing the row to contain a different existing node in case of splitting/pooling is not currently supported by the editor. If iRODS collections have been created, SODAR will check for existing files under the name of the material. If fles exist, the UI will alert the user and prompt for confirmation, in order to avoid generating orphaned files.
- Contacts
Contact cells act as string cells with the following expected syntax:
Contact Name <contact@example.com>. The email can be omitted. Multiple contacts can be provided using the semicolon character as a delimter. For example:Contact1 <c1.example.com>;Contact1 <c2.example.com>.- Dates
Date cells also provide standard string editing but enforce the ISO 8601
YYYY-MM-DDsyntax.
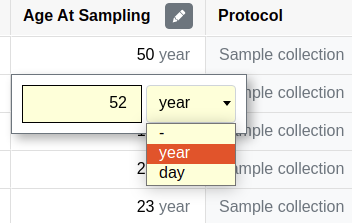
Numeric Input with Units
Numeric columns associated with one or more units open up a popup editor, where the unit can be selected along with the value itself. The default unit is automatically selected.
Unit cell editing
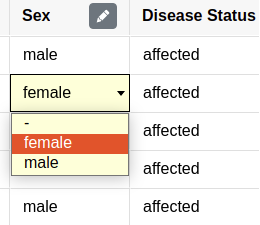
Option Selection
Certain columns may be configured to have the value selectable from a number of acceptable options. For these you will see a standard dropdown for selecting the correct value.
Selection cell editing
Ontology Term
Editing an ontology term cell opens up a modal which enables you to search for ontology terms and select one or more of them. The modal consists of ontology search elements at the top and currently selected ontology term(s) on the bottom.
One or more ontologies allowed for the column can be searched by keywords in the top section. Search results appear in the selection box below. If multiple ontologies are allowed for the column, you can restrict your search to a single ontology as well as sort results grouped by ontology instead of ordering by name.
If only one term is allowed for the column, any existing selection will be overwritten. Otherwise the new selection will be appended to the list. Selected ontology term entries can be sorted, edited or removed using the buttons on the right of each ontology term.
Manual term entry is also possible by simply typing to the text boxes at the bottom of the current entries and clicking the Insert Ontology Term button.
Changes to the cell’s ontology terms will be saved upon clicking the Update button on the bottom right of the modal. You can also cancel any changes by clicking the Cancel button.
The top right corner of the modal displays controls for copying and pasting ontology terms between cells.
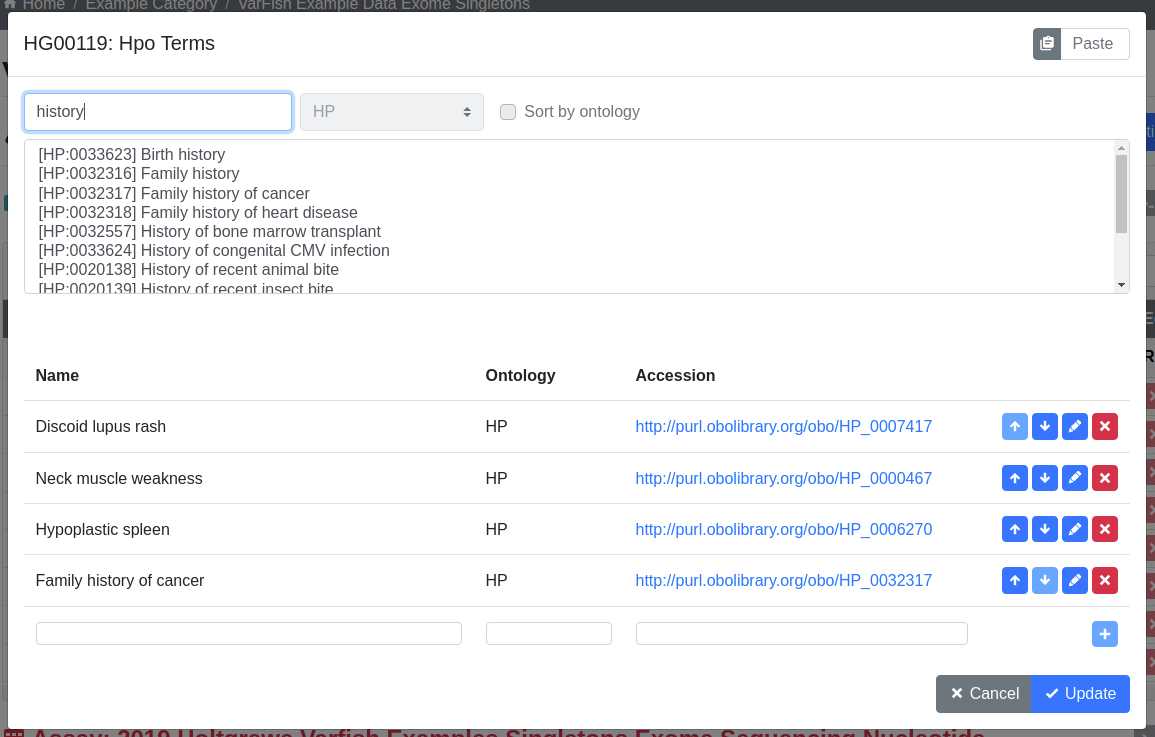
Ontology term editing
External Links
Columns named External Links are a special case. The values are rendered as
badges, while editing is done with a standard string input expecting the
following syntax: id_type:id;id_type:id

External links cell editing
If configured on the server side for a specific key, the badges will link out to
the ID on the appropriate external web service. This has to be configured by an
administrator in a JSON file accessed via a path set in the
SHEETS_EXTERNAL_LINK_PATH variable. For more information, see
SODAR Settings.
Row Editing
The editor allows you to insert rows into study and assay tables, as well as delete existing rows.
Row Insertion
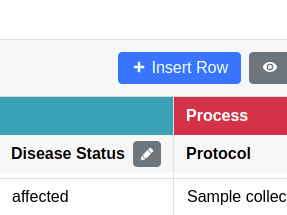
To start inserting a new row into a table, click the Insert Row button on the table card header.
Insert row button
A new empty row will be inserted into the bottom of the table. You are expected to fill out nodes from left to right. The next node to the right will become available for editing once the previous one has been named.
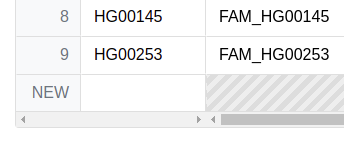
New unsaved row
Names of all nodes must be filled out before the row can be saved into the database. Exceptions for this include unnamed processes, which will be autofilled, as well as File type materials which can remain unnamed. Characteristics, factor values and other metadata fields can be filled or left empty at this point. Their values can be edited freely just like any other cell after saving the row.
Hint
The easiest way to fill up new nodes is to set default name suffixes for nodes which enable autofilling nodes. For more, see the Column Configuration section.
If you enter the name of an existing node in the same column for splitting or booling, other cells of the node are autofilled match the existing “copies” of the same node.
Once all the mandatory fields have been filled, the save button on the pinned right hand side column becomes available. Clicking the button validates the sample sheet and saves the row into the database. Alternatively, you can cancel inserting the row using the cancel button.
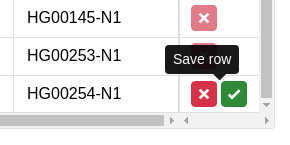
Row insertion cancel and save buttons
Warning
Unlike regular cell edits which are saved instantly, newly inserted rows are not saved until the save button is clicked!
Some functionality is disabled while editing of an unsaved row is in process. Saving the row or cancelling the operation will re-enable those features.
Inserting rows into asasy tables has one major difference to study tables: as samples and preceeding nodes are expected to already be in the study table, you first need to select an existing sample in the sample name column. This will fill the cells up to sample, after which you can continue editing the remaining nodes in the assay table. Saving and cancelling work similarly in both types of tables.
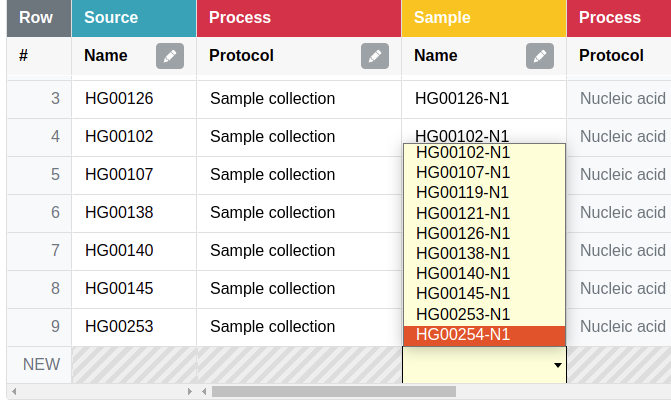
Sample selection when inserting an assay row
Note
In the current implementation, you can insert one row into any table at a time. Multi-row insertion may be added in a future SODAR release.
Attention
After inserting a row, you are unable to change a specific node to another existing one: changing the node name will simply rename the node. Switching between existing nodes for a row may be implemented in a further SODAR release. For now, you need to delete the row and insert a new one in case of e.g. accidentally selecting the wrong existing node.
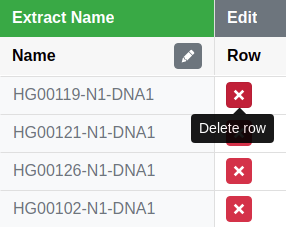
Row Deletion
A row can be deleted from a table by clicking the delete button on the pinned right hand side column. The UI will request confirmation before deleting the row.
Row deletion buttons
Warning
Deletion can currently not be undone without restoring a saved backup version of the entire sheets!
Study rows can only be deleted if the sample listed on a row is not included in any of the study’s assays. Deletion buttons for these rows are inactive in the UI. If you wish to delete a study row, make sure to first delete rows containing the corresponding sample from all assays.
In the current implementation, deleting all rows of a study or assay table is not permitted. At least one row must remain in the table to ensure sample sheet validity.
Column Editing
Attention
Inserting or removing columns to study and assay tables is not currently supported. This functionality will be added in a future SODAR release.
Investigation/Study Metadata Editing
Attention
Editing investigation and study metadata or study protocols is not currently supported. This functionality will be added in a future SODAR release.
Adding and Removing Studies and Assays
Attention
Adding or removing entire studies or assays is not currently supported. This functionality will be added in a future SODAR release.
Saving Backup Sheet Versions
As has been described before in this section, changes are saved to the sample sheets when cells are edited and rows inserted or deleted. The application also enables saving backup versions of the entire ISA-Tab, which can be restored or exported later.
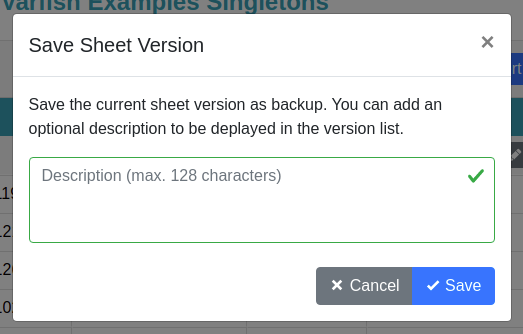
There are two ways to save a backup version. Upon clicking the Finish Editing, button, the current sheet version is automatically saved as a backup version if changes have been made since entering the edit mode.
The user can also save a backup version manually by clicking the save button next to the Finish Editing button. This opens a modal where you can enter an optional description for the version for e.g. specifying which changes were made and why.
Version saving modal
For further details on browsing and managing backup sheet versions, see Sheet Version Management.
Column Configuration
Edit mode in the Sample Sheets app allows configuring the column editing to restrict values to e.g. a certain format, value options, integer range, used ontology, etc. The configuration menu for each column is accessed via the right-aligned button on the column header.
Clicking the column configuration button opens a modal for setting configuration variables. The modal content varies based on the column type, but all share a few common elements:
Configuration copy/paste elements in the top right corner
The Editable checkbox for enabling or disabling editing for this column. This is disabled by default. When disabled, users are only able to enter data in mandatory fields such as material names or process protocols when inserting new rows.
The Cancel and Update buttons for committing the configuration change or cancelling it.
Upon first importing or creating the sample sheets, the initial type and configuration of a column is automatically determined by SODAR. The modal controls for specific types of columns are detailed in the following subsections.
Attention
In the current implementation, there are limitations on changing the column type. Most notably, columns expecting ontology terms can not be changed to a basic string/numeric/selection column and vice versa. This functionality will be added in a future SODAR release.
String, Numeric and Selection Input
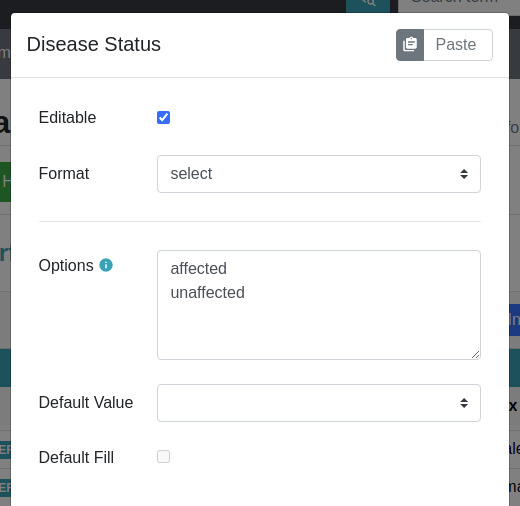
For characteristic and factor value columns with no ontology terms expected, you are given the option to set the column values into string, integer, double or selection. The type of column is selected under Format.
Column configuration modal with select format
Different options for these value formats are as follows:
- Regex
Accepted value as regular expression for string and numeric values.
- Default Value
Default value for the cell when inserting new rows.
- Default Fill
If set true, all empty values in the column will be filled with the default value on configuration update.
- Range
For numeric columns, you can set a minimum-maximum range for accepted values.
- Options
For selection columns, valid options to choose from are listed here.
Numeric Columns with Unit
If unit columns are included for a charasterictic of a factor value in the ISA-Tab, the UI allows setting unit selection for the column. In addition to valid unit selections, you can select the default unit to be applied.
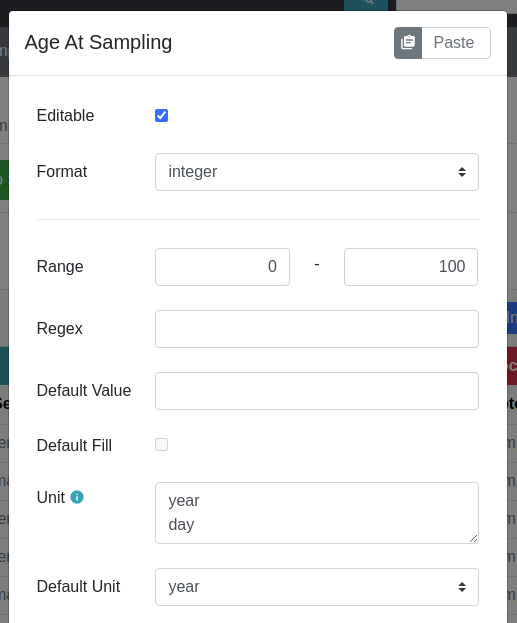
Column configuration with unit
Attention
In the current implementation, setting units as ontology terms is not supported. This functionality will be added in a future SODAR release.
Ontology Terms
For columns which expect values as ontology terms, the column configuration modal displays options for ontology setup. The ontologies up for selections are those uploaded to the Ontology Access application by SODAR administrators.
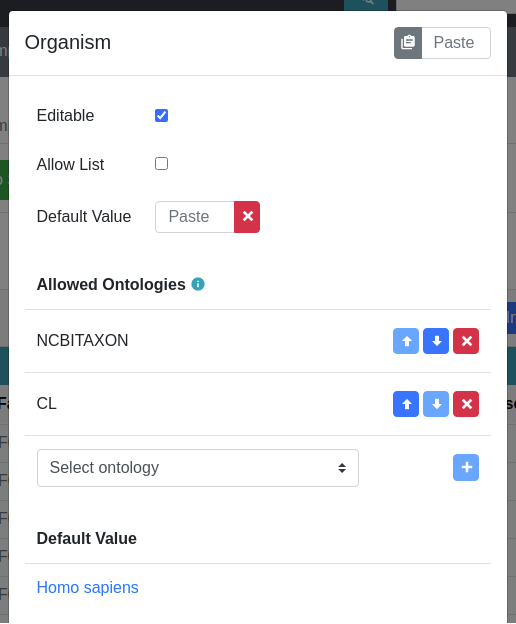
Column configuration for ontology terms
Columns with certain names are autoconfigured by SODAR to accept specific ontologies. These can still be reconfigured manually afterwards if needed. Automated configuration includes the following columns: HPO Terms, OMIM Disease and Orphanet Disease.
The following options are available for ontology term configuration:
- Allow List
If set true, multiple ontology terms can be listed in a single column.
- Default Value
Default term(s) can be pasted here from the ontology term edit modal as JSON.
- Allowed Ontologies
One or more ontologies allowed for this column. They can be reordered, which will affect the ordering of terms when searched.
Node Names
Node names (apart from source) allow the definition of Default Suffix, which incerements the previous node name with a specific suffix automatically. Setting default suffixes for nodes speeds up the inserting of new rows into tables and is highly recommended.
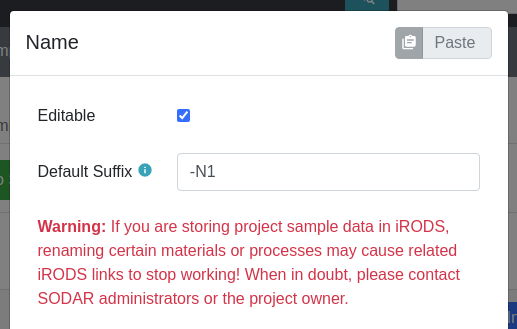
Column configuration for node name
The source name column is a special case, where the UI only allows setting the Editable value to true or false.
Process Protocols
Protocol configuration enables you to set the default protocol applied to new rows for the column. In most cases, only a single protocol is used for an entire column. SODAR detects these types of protocol columns and automatically applies the default protocol to new rows. Thus, in the most common case this configuration does not have to be manually altered by the user when editing.
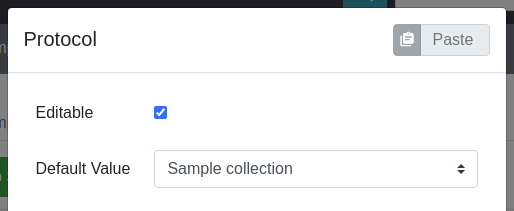
Column configuration for protocol
Attention
Editing and adding protocols for a study is not currently supported. This functionality will be added in a future SODAR release.
Contacts and Dates
These special column types only feature the Editable checkbox, with instructions on the expected input format for cell values.
Update Sheet Cache
In the Sample Sheets UI, iRODS links are activated and deactivated based on whether files exist in collections to which the links are pointing. To reduce the amount of iRODS queries and improve performance, information of existing data is stored in a local SODAR cache.
For most actions such as landing zone operations, the cache is automatically updated in the background. However, for some changes this might not occur. If some links appear to be incorrectly enabled/disabled, you can manually update the project cache based on current sample sheet data.
To do this, open the Sheet Operations dropdown and select Update Sheet Cache. This will start the cache updating operation in the background. You will receive an alert in the SODAR UI once this operation has finished. Note that depending on the size of the sample sheets and the number of associated files, this operation may take anything from a few seconds to a few minutes.