IGV Installation & Setup
This section documents the necessary steps for installation and setup of IGV for visualizing results of Omics experiments.
Note
The installation of IGV from the source site is a moving target because the homepage and download options keep changing. In particular, many Windows users in the clinic are not able to execute installer programs. Further, you will need to enable the “strong encryption” policy of Java. If you want to try this, please go ahead (below are the relevant links) but we cannot support you in this:
Warning
As with the general SODAR UI, Internet Explorer should not be used with IGV. Please use a recent version of Mozilla Firefox or Google Chrome, or some other modern web browser.
Downloading and Installing IGV
Use the following link to download a standalone IGV version (including JRE and strong encryption extension):
Extract the folder.
Note
If you are in a hospital network, make sure that the final extraction target
is on drive C:. Otherwise, your computer’s policy might prevent IGV from
working properly.
Starting IGV
Start the program by double-clicking on the igv.bat file.
Note
If IGV complains that it cannot download IGV files then you have to configure your proxy properly.
See the section “Proxy Configuration” below for more details.
For good measure, visit AmIBehindAProxy.com to see whether you are behind a proxy. If you are not then you can skip the section “Proxy Configuration”.
Proxy Configuration
Please visit AmIBehindAProxy.com to see whether you are behind a proxy. If you are not behind a proxy then you can skip this section.
Otherwise, you have to find out your proxy host and port (e.g., from your IP department). The instructions below use the configuration for the Charite network as an example.
Start IGV and ignore (“click away”) the notification about the failed download.
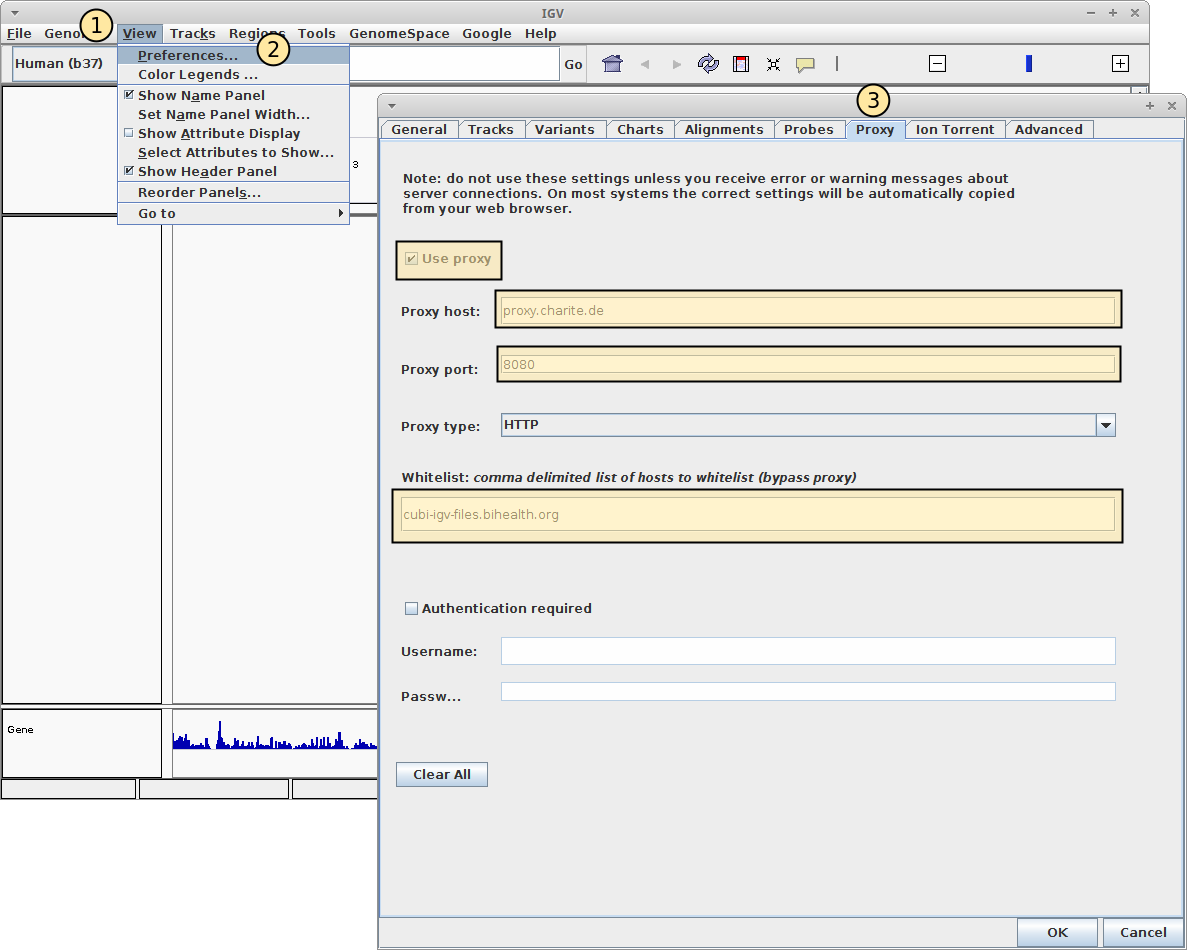
After the main window comes up, open the preference window by using the
ViewMenu, then thePreferencesmenu item (see screenshot below).The preferences window will appear. Go to the
ProxyTab.Check the
Use Proxybox.Enter the following values:
Proxy host: proxy.charite.de
Proxy port: 8080
Whitelist: cubi-omics-davrods-beta.bihealth.org,cubi-omics-beta.bihealth.org,sodar.bihealth.org,sodar-davrods.bihealth.org
If you are outside of the Charite network then please ask your local SODAR
administrator for the values to put into the whitelist.
“Remote Control” Configuration
IGV supports a “remote control” mode that allows you to load individual tracks
or whole sessions directly into IGV from SODAR. Technically, it runs an embedded
HTTP server on localhost and clicking links redirecting there triggers
commands.
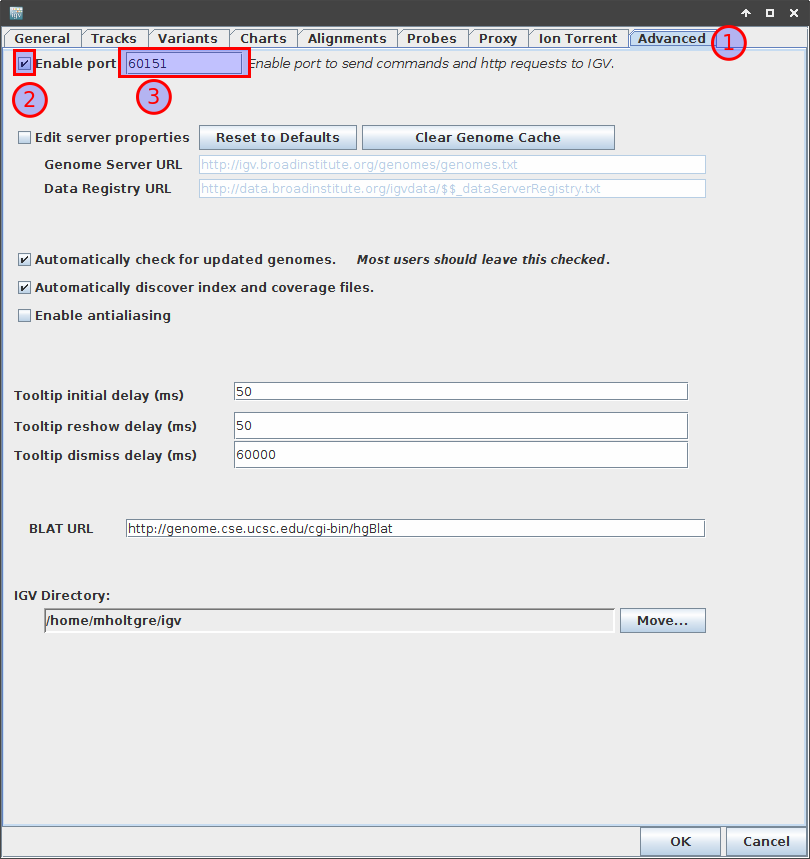
To activate this, you have to go to the Advanced tab of the preferences,
tick Enable port box and ensure the port is configured as 60151.
Restart IGV
This is only necessary in the case that you had to configure the proxy.
After restarting IGV, you should not see any more warning about genomes not being loaded.